Knee Pain Treatment at Home with Dr. Kelly Starrett
Kelly Starrett, DPT reviews pad placements he used to target knee pain and congestion after surgery
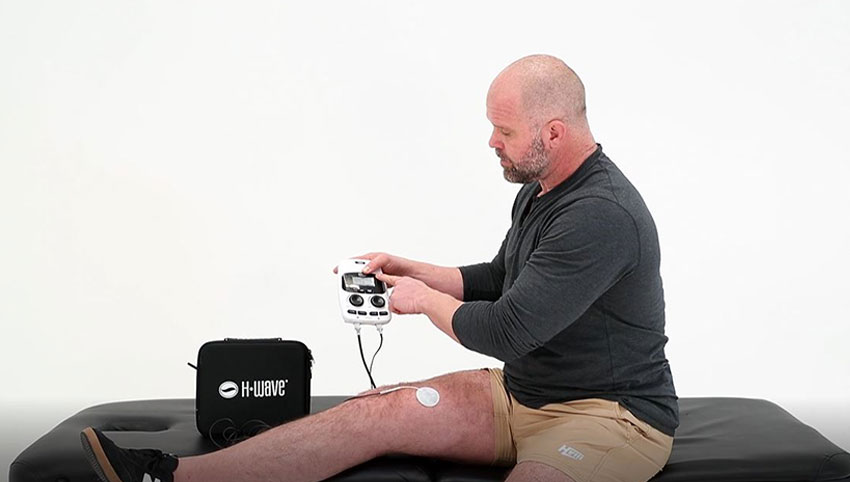
Kelly Starrett, DPT shares his personal experience as an example of a case study for how to utilize the unique technology of H-Wave OTC for knee pain treatment at home. Having gone through total knee replacement surgery more than 13 weeks ago, he breaks down ways to approach treatment to get the maximum benefit in the video below.
Knee Pain Treatment at Home
Kelly highlights the main goals for knee pain treatment at home after surgery:
- Continue to decongest the area to manage buildup from the post-surgical loading of tissues
- Use H-Wave immediately after surgery to manage pain (or as needed for on-demand pain relief)
Kelly recognizes that a huge problem with chronic pain is that it can cause a guarding effect which creates fear around the idea of movement. The brain has become used to associating movement with pain, therefore it will want to protect you against moving in order to avoid the pain. Simply put, those in chronic or significant pain are definitely not excited to get the movement necessary to flush the lymphatic system and help your body heal, especially after surgery.
In order to flush the lymphatic system properly, the chief goal is to get as much non-fatiguing muscle contractions as possible. Kelly reviews a few pad placements that he used to help accomplish this goal:
1st Placement – Example that provided good results for Kelly:
- Using LOW frequency, slowly dial up the intensity and then let those non-fatiguing muscle contractions as long as possible.
- What’s happening with these muscle contractions is your brain is perceiving that movement is occurring in a non-threatening way. This movement keeps that connection between the muscle tissue and the brain, and also helps to load tissues without stressing them.
- NOTE – you can move the location of the pads slightly until you get the strongest contraction that you’re after.
2nd Placement – Goal is to get a more global flush:
- Using LOW frequency, slowly dial up the intensity until you get the desired contraction. This will help get tons of movement without overloading the tissues, and still be able to manage the congestion.
If you recognize that there’s pain that needs more of a targeted approach, Kelly suggests doing a combination of different placements. You can target the pain with on-demand relief by doing a different setting with one set of the pads to help get your brain to think about treating pain in a different way.
3rd Placement – For targeted on-demand pain relief:
- NOTE – use a shorter treatment time (approximately 30-45 minutes) for this approach
- Kelly sets the channel to HIGH frequency and places the pads on either side of knee joint. Then he increases the intensity which provides on-demand pain relief while the other set of pads is on LOW frequency to continue the pumping. This combo placement achieves both goals of pain relief and congestion relief at the same time.
Kelly also notes that if pain relief needs more attention, you can double up both set of pads using High frequency to really target that area and get some immediate relief. But this frequency should only be used for about 45 mins or less, so that you can move back to using Low frequency for extended periods of time to continue to flush out waste and buildup, and bring nourishment into the area with increased blood flow.
Watch the full video below:
You may also like:
Simple Steps To Manage Your Pain While At Home | Kelly Starrett, DPT
Pad Placement for Electrical Stimulation-Tips & Tricks with Dr. Kelly Starrett, DPT
Total Knee Replacement Surgery Series with Dr. Kelly Starrett, DPT – Part 1